The ultimate luthier's vise

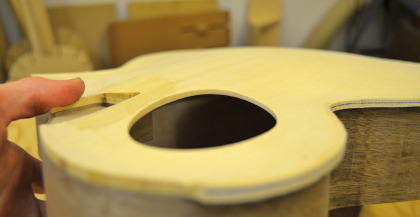
An essential part of my workbench is this modern patternmakers' vise:

As you can see, it can hold odd-shaped parts at unusual angles, making it a lot easier to carve the complex three-dimensional shapes that guitar are made of.

It is based on original designs by Joseph Emmert, and patented way back in 1919. Like so many others, Emmert Manufacturing went out of business in the 1970s. Lee Valley Tools developed and sold an improved, canadian-made version for a while, but now it too is unavailable and highly sough after. The one that I use is an inexpensive reproduction made in the far east. I doubt it is as precise or sturdy as the real thing, but it works.

You can see why these are so useful: the whole vise can be pivoted from vertical to horizontal orientation, and rotate 360 degrees. I use this feature all the time to hold necks at a comfortable angle for carving with a rasp and spokeshave. The jaws open 13", and the outer one can be quickly skewed 5 degrees left or right to hold wedge shapes, like the bodies of some of my ergonomic electric guitars. An auxiliary insert can hold pieces at up to 20 degrees of skew. And by flipping the face 180 degrees, I have a set of small jaws perfect for holding nuts and saddle blanks while they're being shaped.

Truly this is the ultimate luthier's vise.

Stay Sharp

The first thing I was taught about woodworking was how to sharpen a knife. At 7 years old, I just wanted to make a wooden boat, a plane, a toy sword, and I wanted to do it Right Now! To my disappointment, my dad gave me a small knife, a demonstration of how to sharpen it, and the admonishment that until it was sharp, really sharp, I wasn't making anything at all.

I'm not alone. Although I didn't realize it at the time, this is the same treatment given to beginner apprentices the world over, from medieval europe to Japan, since time immemorial. Sharpen the masters' tools for a few years, and maybe one day he will deign to let you cut wood. It is as true as it has always been that the quality of a craftsmans' work is only as good as the quality of his edge.

I got to be pretty good. I had been using modern synthetic Japanese waterstones, which make short work of even the hardest steel, and can be persuaded to leave an excellent edge. But they need to be soaked in water and routinely need to be flattened as they wear, so they're a bit messy. Worse though was inconsistency- sometimes I could get a great edge, sometimes I couldn't no matter what I did. This was an issue of my technique. You can't buy your way out of it. So when I stumbled across these pages by Brent Beach I could see a better way.

Finally someone had taken a rigorous scientific look at what actually takes place at the edge when sharpening woodworking hand tools. In a craft driven largely by adherance to tradition, or else by "persuasion by anectodote", it was long overdue, especially in light of the great advances in materials technology that was beginning to filter down to artisan-scale and amateur woodworkers. Chisel blades can be made of exotic pressure-sintered alloys that stay sharp 10 times longer; abrasives have become so advanced it's hard to believe that I used to simply rub a piece of steel against a fancy rock. In my workshop, the stone age is (almost) over.

So here's my setup that I use for plane and chisel blades (knives and gouges are still in the neolithisphere):
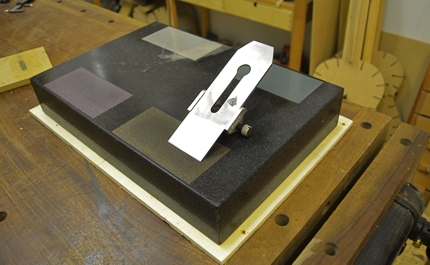
I use an inexpensive 12"x 18" granite surfacing plate as my substrate. Even though it's only B (workshop) grade, it's extremely flat and precise by woodworking standards. Instead of sharpening stones, I apply adhesive-backed diamond abrasive film in four grits. These are light-years beyond anything else out there- the diamonds cut through any steel (and even tungsten carbide) quickly, the mylar backing film is accurate and tough but ever-so-slightly resilient, and the particle sizes are incredibly fine and closely graded.

Drawing fron Beach's research, I know that it is important to maintain very consistent angles while honing the edge. This simple jig sets the projection of the blade while it's in the blade holder:

This blade holder is rather short; because I don't want it to ride onto the abrasive sheet (which would change the angle and possibly damage the sheet) I attached them sideways. This keeps the roller of the holder clearly on the granite surface. To carry away the swarf (that's the term for the fine powder of metal that comes from abrading the blade) and keep the abrasive from clogging I simply use unscented baby oil. It's also viscous enough that I can tell the condition of my edge by looking at the trail left by the blade:
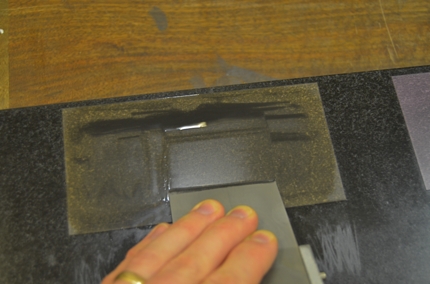
Probably the key point of Beach's research is the importance of creating a microbevel on the back of a plane blade after honing the front. Only by doing so is one able to completely remove the worn-down edge and create a truly sharp blade. I found that the back side of my blade holder was just high enough to create a perfect 1.5 degree back bevel:

That's just the first step, the 15-micron sheet, referring to the size of the diamond particles (0.015mm). After that I reset the blade in the holder to obtain a 2-degree-higher front bevel angle (and thus a very slightly higher back-bevel angle) and hit the 3-micron abrasive. Following another blade projection adjustment is the 0.5 micron abrasive, and finally one last blade adjustment and 0.1 micron abrasive film (just for perspective, that's smaller than the wavelength of visible light!). If the blade edge is good and just needs to be sharper, I would skip the 15 and start directly on the 3-micron. Chisels get a similar treatment, though they are polished flat on the back rather than beveled.

It might seem a little laborious, but in fact takes very little time. The diamonds cut so fast, and because of the multi-bevel nature of the system very little metal has to be removed, so if a blade is in good shape it only takes 5 or 10 strokes on each sheet. The oil can be wiped up with a rag and the stone simply covered to keep out dust, and there's no fear of hidden water droplets causing rust on my tools. I don't have to flatten my stones- when the abrasive films wear out, it's a simple matter to peel one off and apply a new one. Of course, all this wouldn't matter if I didn't get good results. I'm very pleased with them, but you can judge for yourself:

The ugliest tool in the shop

The tops (and sometimes backs) of my archtop guitars are carved by hand out of thick slabs of solid wood. While the shape on the ouside is important, what about the inside? It has to be smooth like the outside, but has to be precisely the right thickness, tapering thinner towards the edges.

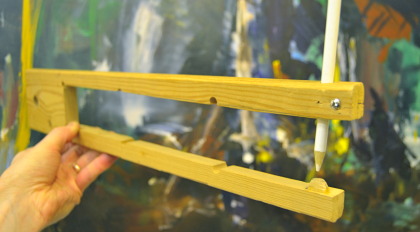
How do I get them so thin without carving away too much? I know many luthiers use precision-machined deep-throated calipers, perhaps even with a digital readout. There exist also sets of carefully calibrated magnets that measure using their attractive force. But I use this, probably the ugliest tool in the shop:

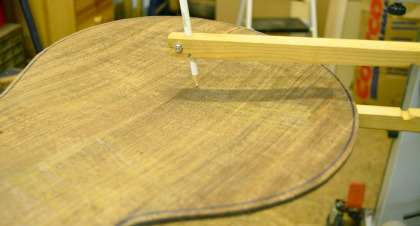
It's a piece of scrap wood (from a trashed ikea chair, no less), with a knob of wood glued to one arm and a pencil jammed in the other. It's a very simpe machine. And yet, it has proven to be perfect for the job at hand; simply set the pencil (white in this case for drawing on walnut; a soft artist's pencil for light woods) the desired distance from the knob and draw it across the plate like this:

Wherever the wood is thicker than the gap, the pencil leaves a mark. The arms have a bit of spring to them, so I can tell how much thicker by observing how faint or dark the pencil marks are. Then I simply plane away a few shavings and test again. By adusting the gap and looking at the pencil marks, I can also carve the plate thinner toward the edges.

It's extremely precise, it marks and measures at the same time, and it's basically free. I've been using it for sixteen years and ten archtop guitars- and only replaced the pencil once. Ugly or not, it's one of my favourite tools.

Resurrection

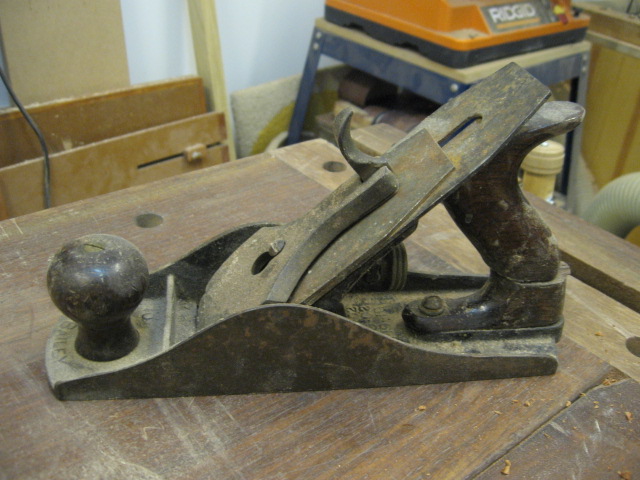
Woodworkers and musicians have a couple of common fetishes: stuff that's old, and stuff that's cheap. Luthiers of course get a double dose of that impulse. So imagine my joy when I was given this five dollar garage-sale special:

This is not just some rusty old handplane; according to Patrick Leach's "Stanley Blood and Gore" (the best reference for old Stanley/Bailey bench planes) this is an authentic Bailey #4½ made between 1902 and 1920.

Despite its age, there is only superficial rust, and amazingly all the parts are there. After disassembly, the first thing to do was to clean off all the dirt and rust. Here I'm scouring off the sole using an extra-fine brass wire wheel in the drill press:

Works like a charm! The castings are all very precisely-made and fine-grained, and the lever cap is even nickel-plated. Even the black paint is still glossy under the dust. The original blade, however, is rather thin steel, and it had enough rust pitting that I decided to replace it with an A2 blade from Lee Valley. The original tote was broken pretty badly, and obviously glued back together misaligned, before subsequently being broken again. I decided to replace both the tote and knob.

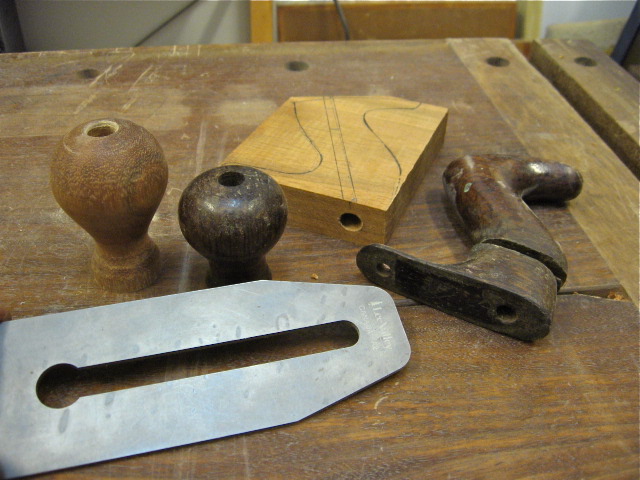
Notice that I made my own knob much taller than the original. The short knob is a design flaw with these old planes that makes them uncomfortable to use. It was corrected around 1920- that's how I know mine is older than that. I made the new ones of Jatoba, which is not quite so beautiful or pleasant to touch as the original rosewood but quite a bit cheaper and tougher. This is after all going to be a working tool, not a showhorse.

There were a couple of details that needed attending to in order for the plane to work to its ultimate potential. The mouth needed a very slight widening to accomodate the thicker modern blade. Some judicious filing ensured that the frog seated perfectly in the body. Most importantly, to work properly, it needs a flat sole. This plane had obviously been used a fair bit, but had never had the sole lapped. After assembling to put the correct tension on the casting, I stuck some PSA-backed sandpaper to a flat granite slab, and rubbed in a figure-8 pattern until it was done.

All done, and much better than new! Considering the time it took to resurrect this old workhorse, I probably could have just gone and got myself a new Veritas bevel-up smoother that would work at least as well. But what would be the fun in that?